Overview
Entering the Armature Builder
To begin, select an armature. While it is not required for it to be on center of the scene (0,0,0), it is recommended.
In the Properties panel, go to the Objects tab, and click on Enter Armature Builder.
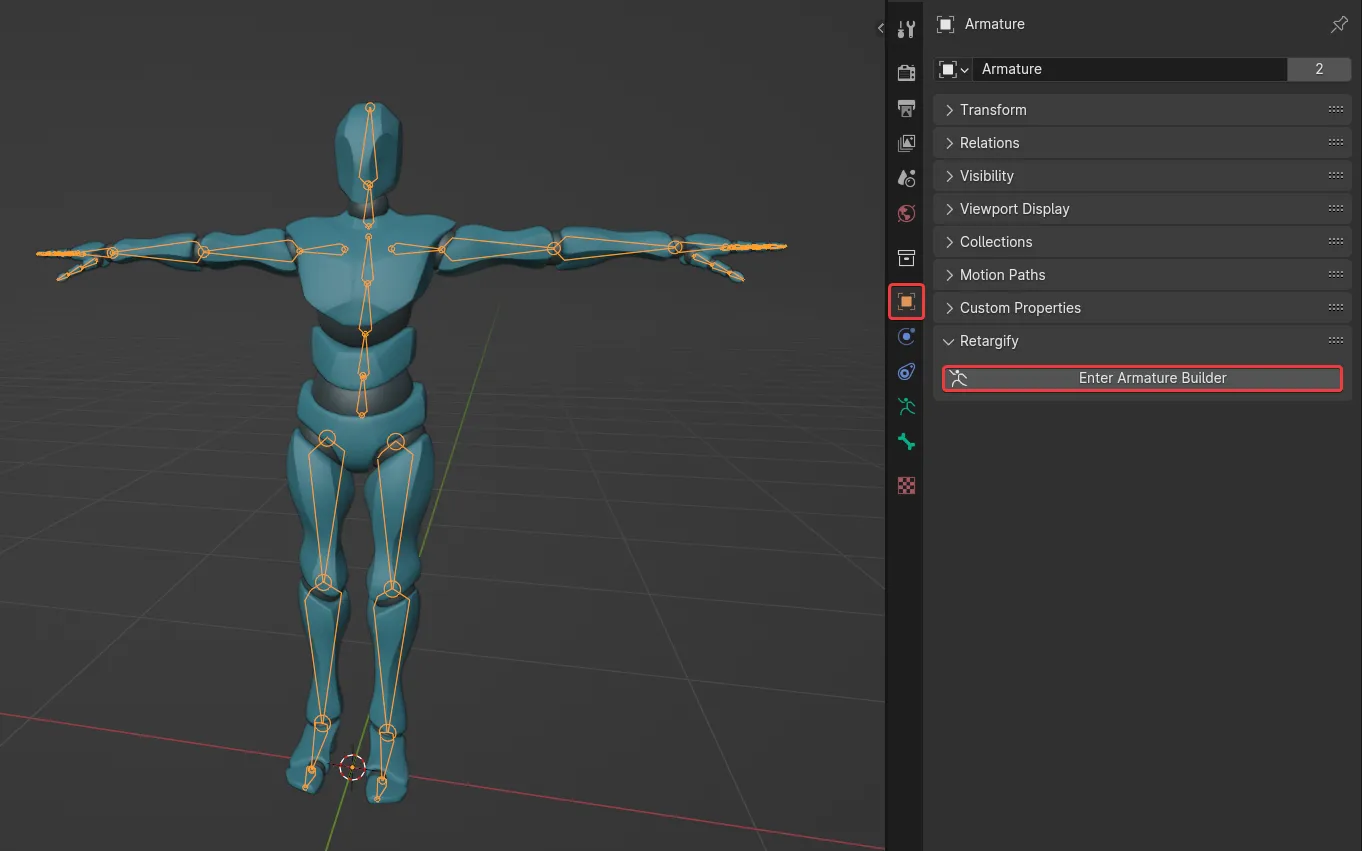
A new armature will be created, labeled the “setup armature”, which is a duplicate of your armature that you can modify to your liking. Only Rigify data will transfer between the two armatures.
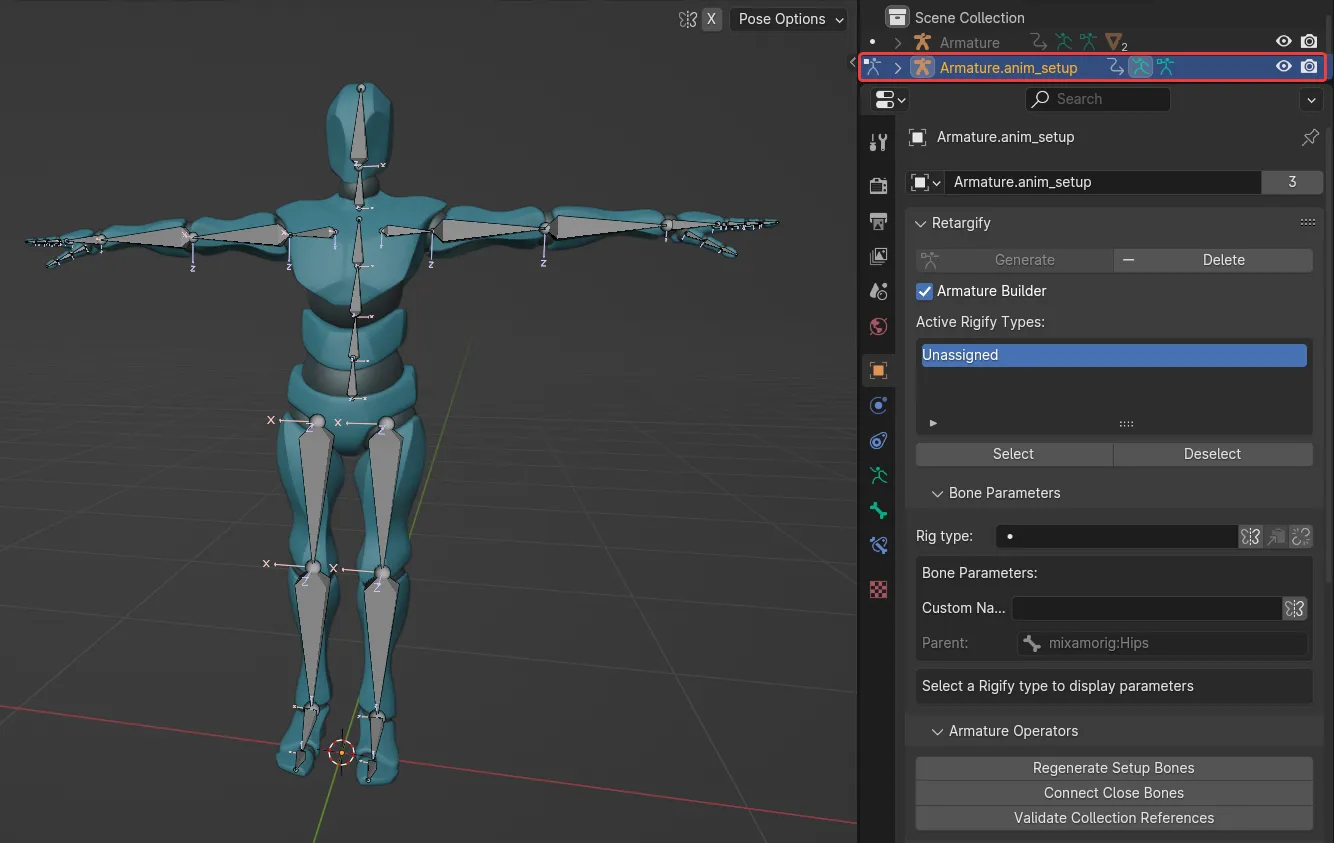
Capabilities & Limitations
Since it is an armature duplicate, you have a lot of freedom to modify it. You can:
- Add and remove bones.
- Change the location of each bone to modify its pivot point.
- Change bone parenting of each bone.
- Add constraints.
- Change bone parameters.
- Change all Rigify parameters.
- Move either armature to separate collections.
However, there are still some limitations. You cannot:
- Rename bones directly. (Use custom bone name instead).
- Change the setup armature position in object mode (The base armature drives these parameters).
- Delete the setup armature directly (Use the delete button instead).
If you deleted some bones and you want them back, you can regenerate setup bones to recover any missing bones and reposition new and existing bones back to their default position.
Setting Up the Armature
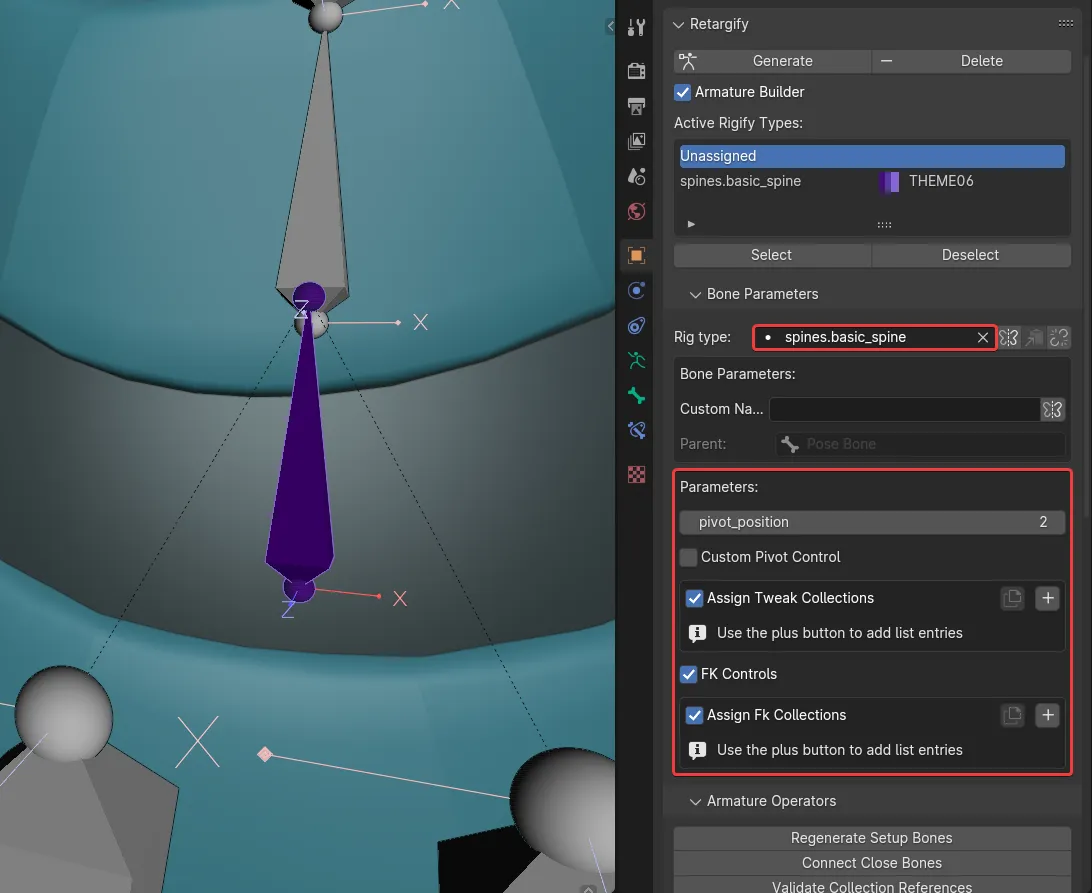
Rigify works by marking bone chains with a rig type, each type has its own behavior, parameters and requirements.
Retargify works the same way, adding various features to speed up the rigging process and provide better clarity, such as coloring marked bones, and sorting all rig types into a list you can sort through.
Connecting
Since we’re working with a Mixamo armature, some bones will be disconnected. Rigify requires bone chains to be fully connected, so we can connect chains together with Alt C.
Some bones may look connected when in reality they aren’t, so for that you can connect close bones.

If you happen to use a disjointed armature, the same process applies. Make sure all bones you’ll be working with are connected for Rigify to work properly.
Marking
For a simple humanoid character, we’ll only need the following types:
- spines.basic_spine
- spines.super_head
- limbs.arm
- limbs.leg
- limbs.super_finger
- basic.super_copy
Don’t be afraid to experiment with other types that may work better for your character.
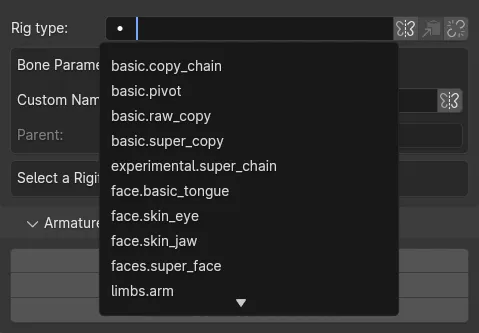
The rig type entry will show a list of rig types, and you can type in it to filter specifc types. Each rig type has unique parameters you can modify.
The parameters for the types we’re using won’t need any tweaking, since they are fine by default.
Organizing
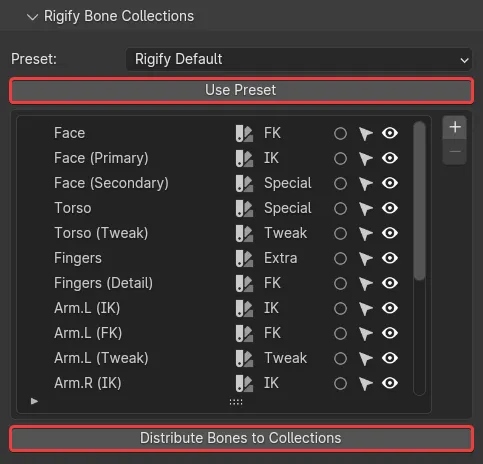
The Rigify Bone Collections sub-panel is where you can organize bones into bone collections. Retargify features collection presets to import collection data instantly, Only “Rigify Default” is available by default, but you can create your own to suit your characters better.
With Rigify Default chosen, use preset to populate the list with the standard set of Rigify collections.
After that, distribute bones to collections will assign bones to their respective collection based on their Rig type, also assigning FK/Tweak layers automatically.
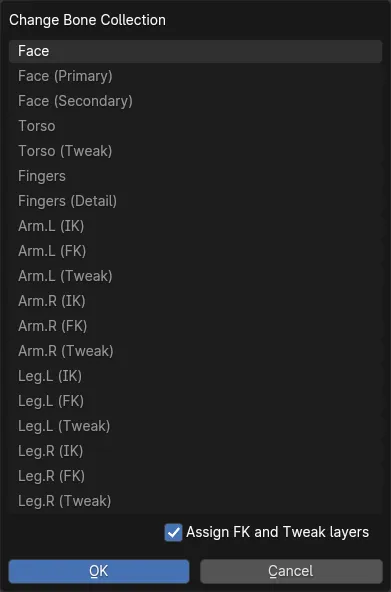
This works best for humanoid armatures, but if your character is more exotic or has additional bones, you can use the enhanced collection assign menu instead, activated with Alt M. and manually select which collection to assign the selected bones to.
Troubleshooting
After marking all bones, connecting bones and removing some unneeded bones, the armature should look like this.
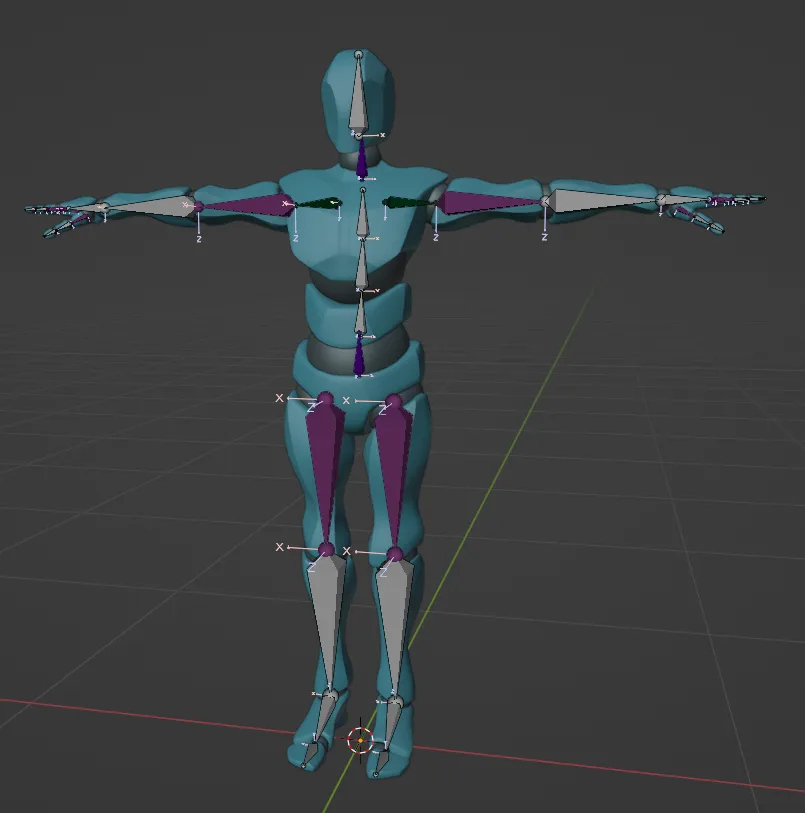
Click on Generate, and you may get an error message explaning what’s wrong. We’re missing a heel bone for the leg type.

Duplicate the toe bone and place it roughly where the heel would be.
Generate again. In the case of this Mixamo character, limbs are bending rather strangely, so to fix this, move the middle of the limb slightly away from its bending direction. This will move the bone’s pivot point slightly.
Generate a final time, and you should be done! There is no more setup needed to use the controller rig, so you can begin animating right away.
If you want to make changes to bone parameters, you can update the controller rig without losing any of your existing animations. Experiment and find the best setup for you!
To go back to the base armature, click on Toggle Animation Armature. This will disable the constraints driving the base armature, and hide the controller rig.
If you want to know more about each rig type, read the Rigify documentation, as it explains each bone type and other Rigify features in detail.
Animation UI
Retargify organizes the animation UI into a more straightforward layout. You can find it in the Animation tab to the side of the viewport
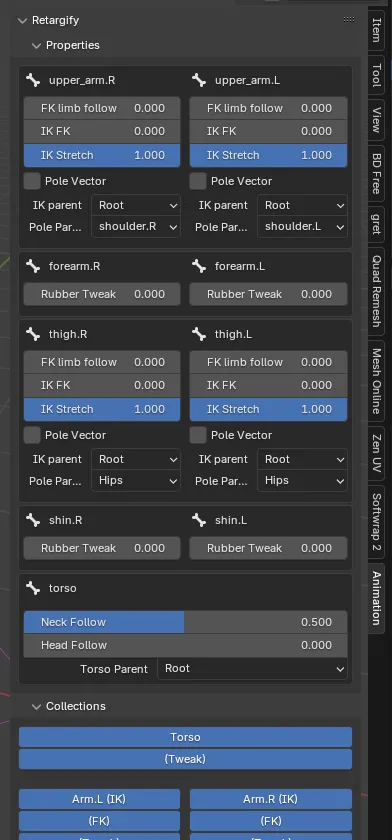
Here you’ll find the bone properties of the entire rig, as well as the bone layers and the widget editor.
If the widgets in your character don’t fit the character, you can enter the widget editor to move them around. You can move, rotate and scale them.
Baking and Export
After you’re done with your animation, all you have to do is bake the action or NLA track to the base armature, and export it to your desired file format.
Since the animation data from the animation armature remains, you’re able to go back and make adjusments until you’re happy the result.
The relevant animation data will get overwritten on bake, so you won’t need to worry about creating duplicate animations.
More detailed information for baking and exporting can be found here